Monday, June 24, 2013

Flexible CSS column separators done right

This article shows how to design column separators for common grid layout systems. Sample code as jsFiddle. The solution should work for all grid systems that use floated <div>'s to represent columns.

I'm using Twitter Bootstrap quite a lot these days. One of it's nice features is the grid system which makes it easy to design multi-column layouts. And of course there are many other similar grid systems out there (960 grid system being one of the first of them).

Most of them work by aligning floated divs side by side. What many of them are missing though is the possibility to show column separators, i.e. lines in the middle of two columns.

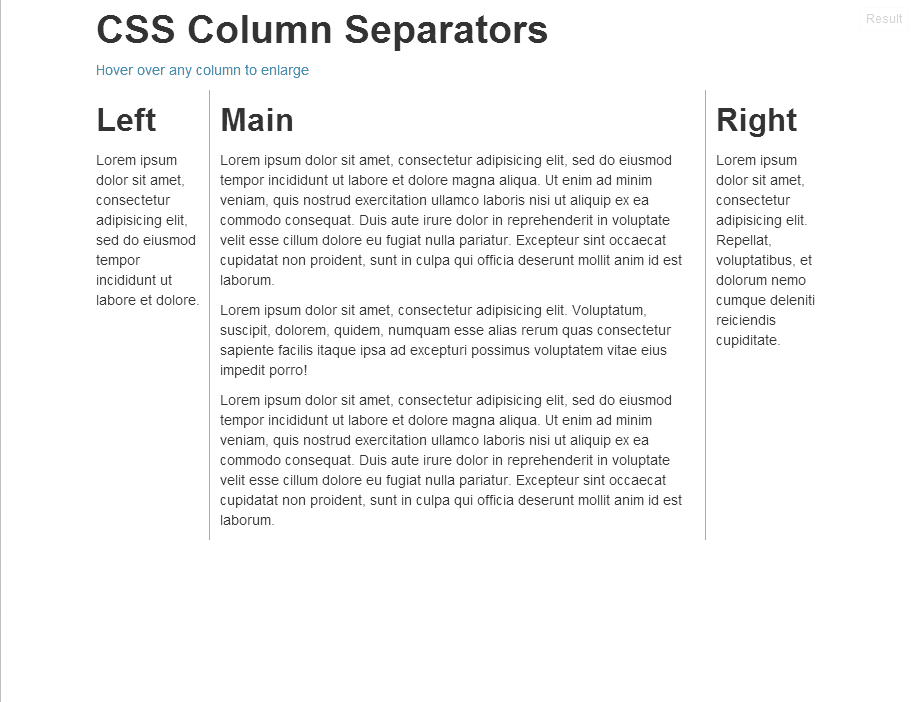
Extend to longest column without markup

The two requirements I had for my project were:

  • Extend to longest column I wanted the separator between two columns to be as long as the longer one of them. Note that this is a design decision, there are of course cases where the separator should only be as long as the shorter column (for which I have no simple solution, yet).
  • No extra markup This goes by itself, of course I didn't want to insert extra markup in my HTML. Column separators should only be set by applying appropriate classes.

So basically the result should look like the images below:

Naive approach: border

The first attempt is to use CSS's border property. This sounds easier than it is: common grid layouts use either padding or margin to create the space between columns. But the border in CSS's box model sits right between the margin and the padding, so we would need to fiddle with both values to place the separator in the center between columns. And since most grid systems put some care in getting the values right we will very likely brake the layout, at least in border cases.

Moreover, for our "longest column" requirement we will be using one line to the right of the left column together with one line left of the right column. Using border-left and border-right it would be difficult to make the borders collapse (it might be possible using negative margins, but this will not make things easier...)

Absolute separator

So our solution involves an additional element representing the separator. This element sits right in the middle between the columns, using position: absolute; and the proper right respectively left properties.

And since we didn't want to introduce extra markup, we'll be using CSS's :before pseude-selector to generate this separator element

First attempt

We define two classes, .border-left and .border-right. A column having class="border-left" will have a separator to its right neighbour, class="border-right" separates it from the column to its left.

The CSS for these classes looks as follows

.border-left, .border-right { position: relative; }
.border-left:before, .border-right:before {
    position: absolute;
    width: 0px;
    border-left: 1px solid #aaa;
    height: 100%
    top: 0px;
}
.border-left:before { left: -11px; }
.border-right:before { right: -10px; }

Some notes:

  • The classes are applied to the <div>'s representing the columns. Since we want to position the separators using position: absolute, we must make the 'anchor' elements (i.e. the columns) positioned relatively. Note that the CSS standard states that the pseudoelement is inserted inside the main element (just before its content), so absolute positioning works as wanted.
  • the left and right values differ by one pixel. That's because there are exactly 20 pixels between the columns (at least in Bootstrap's standard grid system). Therefore there is no single "center pixel", the center line lies between pixels ten and eleven. So we have to choose one of these pixels, in our example the choice was eleven.
  • The value for left and right depends on the settings for your layout system. Bootstrap uses 20px you might adapt these values if you use different gutter widths. For Boostrap, an elegant solution is to use the LESS sources, @import 'variables' and calc left and right using the @gridGutterWidth. In order to work for even and odd gutter widths, you can do left: -ceil((@gridGutterWidth+1)/2) and right: -floor((@gridGutterWidth+1)/2).

Both sides, please!

So what if we want a column to have separators on both sides? Ideally we would simply apply both classes (.border-left and .border-right) in this case. Unfortunately this doesn't work right now. For each element, there is at most one :before-pseudoelement, so we cannot generate two column separators (right and left) with the code above.

But fortunately, there is the :after-pseudoelement too. By using this one for the .border-right class, we can generate two separators for each column. The rest of the CSS remains the same. For absolutely positioned elements the order inside the parent makes no difference (well except for z-ordering which is irrelevant in this case since left and right separators won't overlap...)

So the final CSS looks like this:

.border-left, .border-right { position: relative; }
.border-left:before, .border-right:after {
    position: absolute;
    width: 0px;
    border-left: 1px solid #aaa;
    height: 100%
    top: 0px;
}
.border-left:before { left: -11px; }
.border-right:after { right: -10px; }

You finde a complete working example at jsFiddle. The example uses some :hover magic to make columns longer when you move the pointer over it. Just to show the flexibility of the separators...

Whats left...

Bootstrap defines different gutter widths for different media sizes (responsive layout). In order to work, you'll have to set the left and right properties inside the proper @media queries. This is left as an exercise

The approach is easily extended to more advanced column separators. Since you're basically generating a separate element for the separator, you can style it as you wish. Some examples are:

  • Use top:20px; bottom: 20px; height:auto; to make the separators shorter
  • Or bottom: -10px to let them extend below the columns
  • You can also design them using some bitmap pattern. Remove the border, give them a width and a background-image.

I hope this article was of some use to you. I really like the things you can do just using CSS and I keep discovering new ones on every project I do.

Sunday, May 5, 2013

How to display a recursive tree structure with ASP.NET MVC

Synopsis:

This article show how to display a recursive tree structure in ASP.NET MVC with Razor using @helper


Tree structures are ubiquitous in programming. Therefore the task of displaying them in a web application occurs quite often as well.

Component-based frameworks, such as ASP.NET Webforms, usually provide specialized tree-components for this purpose. When using a template engine like Razor in ASP.NET MVC you have to code them "by hand". This article shows an easy way how to do that.

Data structure

Let's first have a look at our model: a tree is a classical example of a recursive data structur. Each Element stores a reference to at least it's parent or to a collection of child elements (or both). These references are again of type Element, hence the recursive nature of the data structure. You'll also may want to have some sort of Index property to define the ordering of subelements within one parent element.

When the data is comes from a relational database you'll typically have a parent reference, so we will go along with this case in our example. Let's say our Element looks like

class Element {
  public string Title { get; set; }
  public Element Parent { get; set; }
  public int Index { get; set; }
}

In order to have some sample data we construct a tree using

private IEnumerable<Element> CreateTree() {
  var root = new Element { Title="Root", Index=1 };
  var element1 = new Element { Title="Element 1", Index=1, Parent=root };
  var element2 = new Element { Title="Element 2", Index=2, Parent=root };
  var element3 = new Element { Title="Element 3", Index=3, Parent=root };
  var element11 = new Element { Title="Element 1.1", Index=1, Parent=element1 };
  var element12 = new Element { Title="Element 1.2", Index=2, Parent=element1 };
  var element121 = new Element { Title="Element 1.2.1", Index=1, Parent=element12 };
  var element21 = new Element { Title="Element 2.1", Index=1, Parent=element2 };
  var element22 = new Element { Title="Element 2.2", Index=2, Parent=element2 };
  var element31 = new Element {Title="Element 3.1", Index=1, Parent=element3 };
  return new List {root, element1, element2, element3, element11, 
                   element12, element121, element21, element22, element31};
}

This results in a structure like

  • Root
    • Element 1
      • Element 1.1
      • Element 1.2
        • Element 1.2.1
    • Element 2
      • Element 2.1
      • Element 2.2
    • Element 3
      • Element 3.1

Passing the data into the template


The data structure is passed into the (strongly typed) template via the Model property. For this purpose, we define the model type in our template with

@model IEnumerable<Element>

And pass it as parameter when instantiating our View within the controller

  ...
  return View(CreateTree());
  ...

Getting the root and children of an element


As you have seen we do not explicitely mention the root of our tree when passing the data to the View. As well we have no property for getting the children of an element. This is often the case when you get your data from a single table of a relational database.

Both informations can easily be computed using LINQ queries: for getting the root of our tree we simply look for the element having no parent using

var rootElements = Model.Where(e=>e.Parent == null).OrderBy(e => e.Index);

This way we also can display trees with "multiple roots" (which are mutiple trees in fact).

The children of an element can similarily be computed using

var children = Model.Where(e=>e.Parent == element).OrderBy(e => e.Index);

One can object that this approach is not the most efficient: for each list subelements you have to scan the whole list. If you're processing very large trees this might be an issue. In this case you should preprocess the tree and construct the set of children of each element explicitely. For small trees the costs for scanning the whole list are usually much smaller than the time taken for database query and can be neglected.

The display function


Now we want to display our tree as HTML, i.e. we want to produce the following output using a Razor template:

<ul>
  <li>Element 1
  <ul>
  <li>Element 1.1</li>
  <li>Element 1.2     
  <ul>
    <li>Element 1.2.1</li>
  </ul>
  ... 
</ul>

Since trees are inherently recursive they are usually also processed using recursive functions. In general one speaks of transforming trees, in this case we transform our data tree into an HTML tree.

A function to write the HTML for our structure (in pseudocode) would look like

  function DisplayTree(elementList):
    write "<ul>"
    for each element in elementList do:
      write "<li>"
      write element title
      if element has children:
        call DisplayTree(children of element)
      write "</li>"
    end for loop
    write "</ul>"
  end function

At the top level (i.e. within our template) this function would be called with a collection containing only our root element.

Razor's @helper function


Now we have to decide where and how to write our DisplayTree function. One way would be to write an extension method for HTMLHelper (e.g. in the Helper directory) and use it in our .cshtml template like

@Html.DisplayTree(elements)

This approach is used for displaying form controls within ASP.NET MVC. Although this would perfectly work, it somehow breaks the separation between view-related "non-visual" code in my opinion: when following the ASP.NET MVC pattern, all HTML-producing parts of the program are written in Razor (i.e. in .cshtml files). When you want to change the appearance of the tree (say add some CSS classes to the list elements) you'd have to find the code in the Helper directory and modify plain C# code.

Luckily there's a better way: using Razor's @helper directive you can write functions (and also recursive ones) right in the template file. An implementation of our Displaytree function in Razor would look like:

@helper DisplayTree(IEnumerable elements) {
  <ul>
  @foreach (var element in elements) {
    <li>@element.Title
    @{
      var children = Model.Where(e => e.Parent == element).OrderBy(e=>e.Index);
      if (children.Count() > 0) {
        @DisplayTree(children)
      }
    }
    </li>
  }
  </ul>
}

To actually display the tree in your page, just put a

...
@DisplayTree(Model.Where(e=>e.Parent==null).OrderBy(e=>e.Index))
...

Example project


You can download an example project which contains the complete source for this article. Note that you will need to download the Nuget packages before running the solution. VS2012 does this automatically when building.

Monday, August 6, 2012

Allowing CodeIgniter models to have the same name as controller

Working with CodeIgniter is fun to me. I like it for being a leightweight, flexible and performant framework which was easy to learn and whose disigns fits well in my way of thinking.
Although one thing that annoys me is that models need to have different names than controllers. In many applications, a natural approach would yield the same name for the model and it's associated controller.
Lets look at a simple blogging app (blogging seems to be one of the "hello world" for webapps after all):
There would be one model Blog which can represent the blog in the database (having methods for getting information about a single blog or retrieving a list of entries).
In CodeIgniter, you put the following code into the application/models/blog.php file:

class Blog extends CI_Model {
   // Code for the model goes here
}


You might also want to implement a corresponding controller Blog, which allows to use URL like /blog/{id}. So you put the following into /application/controllers/blog.php

class Blog extends CI_Controller {
   public function show($id) {
     $this->load->model('blog');
     // Do something with the model
   }
}


This results in an error saying that class Blog is already defined (when CodeIgniter tries to load the model)


The obvious solution to this is to rename the model to, say, Blogmodel


I do not like this for the following reasons

  • It's longer to write. Instead of $this->blog you have to write $this->blogmodel. It's not much but it stills bothers me
  • It's inconsistent with the naming of libraries and controllers in CodeIgniter, which don't need any specific suffixes
  • There's a feature in the Loader class to rename models when loading, so you could do $this->load->model('blogmodel','blog') to use it as $this->blog, but this doesn't work with autoloading.
  • Finally, it's simply not necessary. Models and controllers live in a different namespace in CodeIgniter: There is only one controller (returned by the get_instance() function or referenced by $this) active. Models are loaded as instance variables into this controller object (and are referenced by $this->modelname). So there cannot be a conflict.

So I did a small hack in the Loader class, inserting the following lines into the CI_Loader::model() method:

$model = ucfirst($model);

// Insert these lines
if (class_exists($model . '_model'))
  $model = $model . '_model';
//

$CI->$name = new $model();

I still have to declare my model class with a suffix like

class Blog_model extends CI_Model {
}

but I put it in a file named /application/models/blog.php and use it like

$this->load->model('blog');
$this->blog->do_something();